How to Start A Blog – Easy Guide for Beginners
Starting a new Blog Website should not be complicated. However, there are right ways to start and wrong ways to start. In this article you will learn how to start a blog easily and monetize it in the right way. Let’s get right to how to start a blog – easy guide for beginners in 7 steps.
Step 1: Establish Your Mindset before starting a blog
Creating a blog is serious business. Most people make a mistake of believing that they can start a blog and make money overnight. There are thousands of ‘shiny objects’ in the market place that promise this. Of course, most people who want to be overnight millionaires, fail.
There is an old saying that ‘Rome was not built in a day’. It takes time and consistent effort to start and create a sustainable online business.
Don’t start a blog like a hobby, or with a mindset of making quick profits. Rather, start a blog with a mindset of a business-man/woman.
Be prepared to work consistently, with a clear goal and strategy. Don’t look for overnight success. Build it so it becomes a sustained business.
Let’s start the actual process of blog building –
Disclosure: Some of the links in this article may be affiliate links, which can provide compensation to me at no cost to you if you decide to purchase through the link.
Step 2: How to Identify your Niche

Figuring out you niche is the most important step even before you start your blog. There is an old belief that you should find a niche that you are passionate about. Indeed, it is true especially for those who want to create their own products, whether it is a physical product, a digital product or a service. It is only slightly important for those who want to sell affiliate products. Here are some fundamental principles for finding your niche –
Find a niche that you are comfortable with
You are going to be identified with the niche that you choose. Just be careful that you don’t choose a niche that you don’t want to be identified with. Your future continuous engagement will be affected by your niche.
Find a niche that is not too general
It is extremely hard to succeed in a general niche. The competition will be high, and it will be hard for customers to identify your blog with anything specific. As an example, if you choose personal relationship niche, you may want to go deeper and choose specific areas of relationship – like avoiding divorce.
Find a niche that has many affiliate offers
This is very important for your financial success. You can understand it easily that if your niche has only a limited number of affiliate offers, either the niche is not very popular, or it is not worth monetizing. So, before you decide your niche, research the affiliate offers that are available in this niche.
Find a niche with good affiliate commission
If your affiliate commission is very low, you will find it difficult to meet with the expenses of running your blog, and your profits may be low or non-existent. Your efforts should be compensated adequately. If it does not give you enough returns, you are bound to lose interest in the business.
Step 3: How to choose a Domain Name for your website
How to pick your domain name? There are a few ways that you can decide, choose and buy a domain name.
You can buy a domain name that represents your niche. For example, if you were selling Kitchen related affiliate products, you could buy a domain name that has the word ‘kitchen’ in it. Keep in mind that the best domains are still .com domains. Try not to have any ‘dashes’ in the name. For example try not to buy a domain like kitchen-stuff-cheap that has ‘dashes’ in it.
Another way to decide on your domain name is by buying a domain with your name in it. You can the create a brand with your name.
You can also buy a domain name that is more ‘brand’ oriented – like my domain name ‘hcteq.com’.
There are some web hosting companies/plans that give you a free domain registration for the first year. I generally do not recommend to buy a domain from your web host. Although it is free for the first year, the renewals are generally more expensive than the normal market rate for renewal. Also, if you change your web host in future, it is requires additional work to have the domain transferred to another registrar.
My recommended place to buy your domain is ‘GoDaddy’. From time to time they have a discount offer for the first year registration when you buy two years. I like their support and service.
Check out GoDaddy here
Step 4: Web Hosting
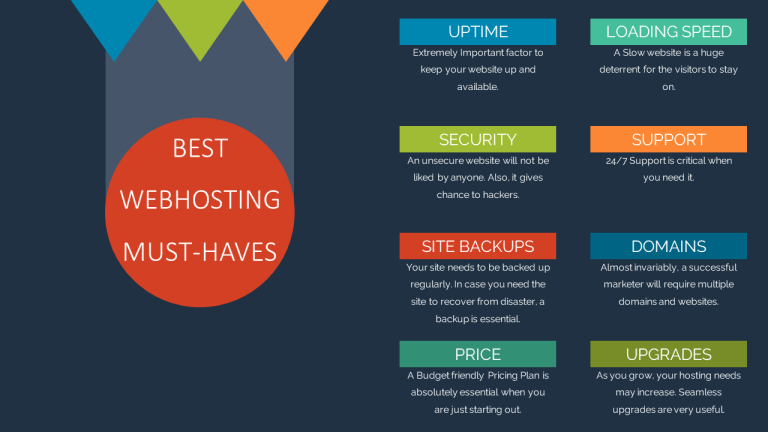
The best web hosting providers are those who can provide the services and support that you need to keep your website up and running. There are a lot of web hosting providers out there, so it can be difficult to know which one is right for you.
Here are some of the things you should consider before buying a hosting plan –
- Price – How much does the service cost?
- Privacy – Does the provider protect your privacy?
- Security – Can you trust your website to be secure?
- Reliability – How reliable is the provider?
- Ease of use – Is it easy to use the hosting service?
- Customer support – How easily can you reach customer support if you need help?
- Functionality – Is the hosting service easy to use?
- Speed – How fast is your website?
- Uptime – Will your website be up all the time?
- cPanel – Does your hosting provider offer cPanel>
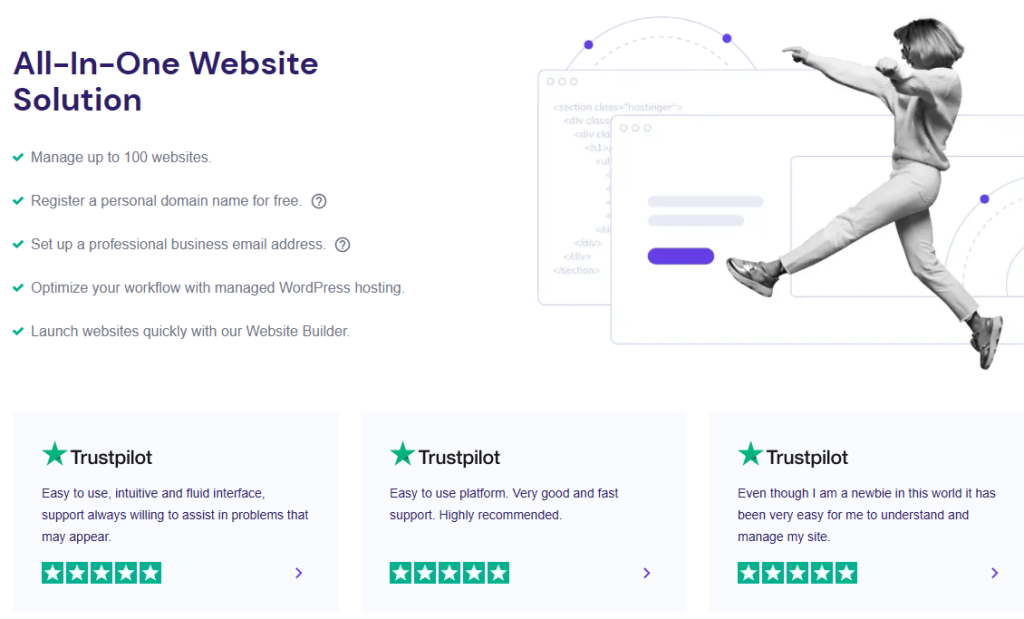
Here is the webhost that I have used and recommend. I am an affiliate of this service and may get commission if you choose to buy through my link at no extra cost to yourself.
Check out Hostinger now. Their plans start at $1.99* per month. You can also view the top webhosting service providers here.
Step 5: Creating WordPress Blog
For a beginner blogger, one of the main questions is – how do I create a Blog in WordPress? Now that we have talked about how to find your Niche, how to choose your domain name, and how to select your web hosting provider, let’s quickly look into how to create a WordPress blog website.
First, a couple of things to consider. If you have bought a domain name from your web hosting provider (most offer a free domain for the first year), then the installation of WordPress is relatively simple. But if you have bought your domain name from a domain provider like GoDaddy, and your web host is different (like JustHost, BlueHost etc.), then you have to setup the Name Server settings of your domain.
So, the next question will be how do I set up my own name servers? This can be done at the domain provider’s website. This is to ensure that when someone types your domain name in the web browser, your domain gets pointed to your website which may be with another web host.
Let’s see how you can setup your Name Server settings.
When you sign-up with a web hosting provider, you will receive a confirmation email with your login details as well as the Name Servers to be used with your domain. You can also find the Name Servers from your web hosting provider’s support.
How to set up your Domain’s Name Servers
Here is the step-by-step process to set-up your domain name servers. Most domain registering companies have a similar process –
a. Log into the client area of your domain provider (like GoDaddy)
b. Click on Domains > My Domains
c. Click on the domain name that you want to set the Name Servers for.
d. Click on ‘Manage Nameservers’
e. Click on ‘Change Nameservers’
f. Select ‘Custom Nameservers’
g. Enter the Name Servers that you received from your web hosting provider. It will look like NS1. xxxx or something similar starting with ‘NS’. Add the Name Servers, one each in separate rows, and Save the changes.
Your Name Servers should get applied soon after that. It can, however, take between a few hours to one day for some service providers. If you have entered the information accurately, you should not have any issues.
Congratulations, you have successfully changed your Name Servers, and you are now ready to start building your blog.
If you have your domain registered through your hosting provider, the setting up your WordPress blog is different. You will not need to set your Name Servers as they will automatically be set up to your web hosting provider’s name servers. You will, of course, still need to do the remaining work. Here is how you can do it easily –
How to make a blog WordPress
Here are the quick steps to setup your WordPress blog quickly and easily through the cPanel –
Most webhosting providers now give you access to Scripts for installing WordPress for your blog. Generally, these scripts are found on the cPanel under ‘Popular Tools’ or ‘Software Tools’ or ‘Scripts’. Depending upon your webhost, you may see slightly different sections.
Once you see the WordPress script, click on it to install. You can recognize the script by the WordPress logo
Here are some of the things that you will need to do –
a. Choose Domain – If you have more than one domain, you should select the correct one that you want to use.
b. In Directory, the recommended directory is the ‘Root’ directory.
c. In Site Name – enter the name of your website/ blog.
d. Site Description – Enter your site’s description. You would want to enter a short description of what your site is all about.
e. Admin Username and Password – Enter a Username that you want, and then enter a Password. I recommend that you generate a Password or use the one that is already generated. Make sure that you copy and paste the Username and Password on another document (like a notepad) and save it somewhere that only you have access to.
This should complete your basic setup information. Clicking on ‘Finish’ or ‘Install’ will create your WordPress blog.
You can log into your blog by using the Username and Password that you just created. WordPress comes with some default free Themes. You will see that one of those themes will have been auto selected for your blog. You can change the Theme if you like.
Here is the top Theme that I recommend.
Selecting a Professional WordPress Theme
DIVI
The Divi WordPress Theme is one of the most popular WordPress themes in the market, created by Elegant Themes. It is a versatile theme that can be used for a wide variety of websites. The Divi Theme has a lot of features that make it a great choice for a WordPress website.
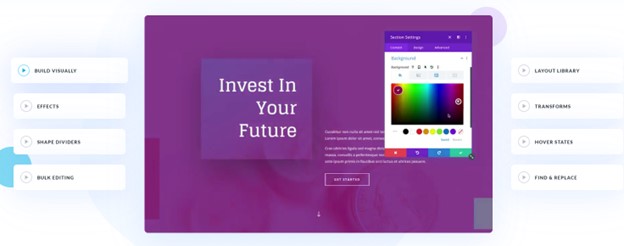
Divi Features:
- A drag and drop page builder that makes it easy to create custom pages without having to code
- Over 800 pre-made website templates that can be easily customized
- A powerful email opt-in module that allows you to grow your mailing list
- Integrated social media sharing buttons to help promote your content
- A built-in split testing tool to help you optimize your website for conversion
These are just some of the features that make the Divi Theme a great choice for a WordPress blog website.
At the time of writing this review, there were more than 21,000 reviews on Trustpilot with an overall rating of 5 stars.
Price:
Yearly Access: $89 per year
Lifetime Access: $249 one time
Creating a Blog Website
By now, you may have bought a domain name, subscribed to a webhosting service, Installed WordPress, and may have either bought a Theme like Divi, or decided to simply use a free WordPress theme. Of course, there are hundreds of free themes available in the market and if you just want to test the waters, you may want to use one of those free themes.
You can always move your blog to a better theme in future – although it is never a straight forward process and can cause some painful moments. Personally, I like to start right and build good foundations even before I start posting content.
This is the time to create a basic structure of your blog’s look and feel.
In any case, now that you are ready to start posting content on your blog, You will need to create a content schedule and plan.